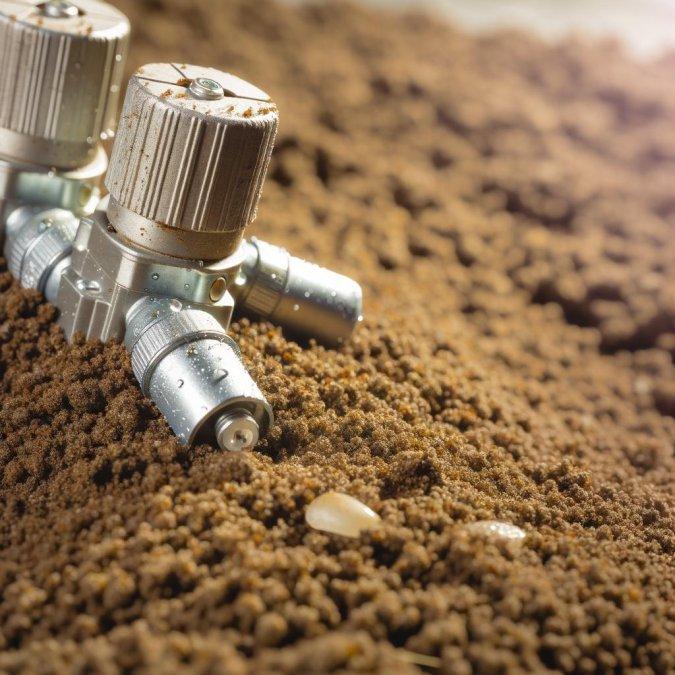
Soil moisture sensors can improve outdoor watering by showing whether the soil around plant roots is actually dry enough to need irrigation.
This is different from watering only by a calendar or judging moisture from the appearance of the soil surface. The surface may look dry while deeper soil remains moist, especially beneath mulch. It can also look damp after a brief shower even when the active root zone received very little water.
The practical benefit: a correctly installed sensor can help delay or interrupt scheduled irrigation when enough moisture remains in the soil. However, the sensor must represent the plants, soil, sunlight, and irrigation zone it controls. Poor placement can make an automated system repeat the wrong decision.
Not Every Soil Moisture Sensor Performs the Same Job
The term “soil moisture sensor” is used for several different devices. Some provide a reading that a gardener interprets manually. Others communicate with an irrigation controller and can prevent a scheduled watering cycle.
Portable Moisture Meter
A handheld probe provides a reading at the location where it is inserted. It can support spot checks but does not normally control an irrigation valve.
Connected Sensor
A permanent sensor can send readings to an application, display, or monitoring platform so moisture changes can be followed over time.
Controller-Integrated Sensor
A compatible sensor or add-on device can interrupt scheduled irrigation when moisture remains above a configured threshold.
A sensor does not automatically improve irrigation simply because it produces a number. Water savings depend on correct placement, realistic thresholds, compatible control equipment, working sprinklers or emitters, and regular verification.
How Soil Moisture-Based Irrigation Works
Soil contains solid particles, air spaces, water, organic matter, and living organisms. A moisture sensor estimates a property related to the water held within that soil.
Depending on the technology, a device may measure electrical resistance, soil tension, dielectric properties, or another characteristic that changes as the soil becomes wetter or drier. The result may be shown as a percentage, a relative scale, soil tension, or a simple dry-to-wet range.
When a sensor is connected to an irrigation controller, the usual purpose is to prevent a scheduled cycle when the soil already contains sufficient moisture. It does not necessarily determine the perfect runtime for every zone.
Soil Moisture Control and Weather-Based Control Are Different
A soil moisture-based controller uses conditions measured in the ground. A weather-based controller estimates landscape water needs using weather data and programmed site information.
Both approaches can support efficient irrigation, and some systems can combine weather information with compatible moisture, rain, freeze, or flow sensors.
Where Soil Moisture Sensors Can Be Most Useful
Moisture monitoring can be valuable where watering decisions are difficult to make from surface appearance alone.
- Automatic lawn irrigation that continues after rainfall
- Mulched shrub beds where the surface dries differently from the soil below
- Drip-irrigated beds where water is concentrated in narrow wetting patterns
- Containers or raised beds that dry faster than surrounding ground
- Properties with sandy, compacted, or highly variable soil
- Sloped landscapes where runoff begins before water reaches the desired depth
- Remote garden areas that cannot be inspected every day
The greatest value often comes from avoiding unnecessary irrigation rather than trying to maintain one exact moisture number every day.
Choosing a Representative Sensor Location
A sensor should represent the area whose irrigation decisions it will influence. The wettest, driest, shadiest, or most convenient corner is not automatically the correct location.
If one valve waters areas with very different soil, sunlight, plants, or irrigation hardware, one sensor may not represent the entire zone accurately. Improving the zone design may be more effective than trying to solve the variation through one threshold.
How Deep Should a Sensor Be Installed?
There is no single installation depth that is correct for every lawn, shrub, tree, vegetable bed, sensor design, and soil type.
The sensing area should generally reflect the active root zone that matters for irrigation decisions. Shallow-rooted turf or newly planted annuals may require a different position from established shrubs or trees.
| Landscape Situation | Installation Consideration | Common Error |
|---|---|---|
| Established lawn | Position the sensor where it represents the active turf root zone and normal sprinkler coverage. | Installing it at the surface where readings change rapidly after sun, wind, or a brief shower. |
| Newly planted bed | Monitor the soil volume containing the developing roots rather than only the deeper future root zone. | Placing the sensor too deep and overlooking dryness around young roots. |
| Established shrubs | Consider root distribution, drip placement, mulch, soil texture, and the area actually wetted by irrigation. | Placing the sensor beside the trunk or directly under one emitter. |
| Raised bed or container | Use a device intended for the growing medium and place it away from drainage openings and container edges. | Assuming a sensor calibrated for mineral soil will interpret every potting mix accurately. |
| Drip irrigation | Place the sensor inside the representative wetted root zone without putting it directly against the emitter. | Installing it outside the wetting pattern and receiving a permanently dry reading. |
Follow the installation depth and orientation specified by the sensor manufacturer. Some devices measure mainly around a small tip, while others use a larger sensing surface. Installing the wrong part of the probe at the target depth can produce misleading results.
Install the Sensor With Good Soil Contact
Air gaps around the sensing surface can interfere with readings. The sensor should have firm contact with undisturbed or carefully replaced soil, according to the installation instructions.
- Map the irrigation zone. Identify sprinkler or emitter locations, sun and shade, slopes, soil differences, plant types, and drainage influences.
- Select a representative location. Avoid choosing the easiest spot if it does not reflect the conditions across the controlled area.
- Turn off irrigation and power where required. Follow the controller and sensor safety instructions before opening wiring compartments or handling cables.
- Install at the recommended orientation and depth. Do not force the sensor into rocky or compacted soil in a way that damages the probe.
- Eliminate air pockets. Restore soil around the sensing surface carefully and avoid leaving loose cavities.
- Protect cables and connectors. Route wiring away from mower blades, edging tools, digging areas, standing water, and regular foot traffic.
- Label the zone and sensor location. Record the plant type, soil condition, installation depth, date, and controller settings for later troubleshooting.
Check for underground utilities and irrigation lines before digging. Use the appropriate local utility-location service and follow all installation and electrical requirements.
Set Thresholds Using the Actual Landscape
A factory default can provide a starting point, but it may not represent the water-holding behavior of your soil or the needs of your plants.
Do not calibrate a system by deliberately allowing valuable plants to reach damaging drought stress. A safer process is to compare sensor readings with direct observations of the soil and plant condition over several normal wetting and drying cycles.
- Begin with the manufacturer’s recommended setting. Confirm that the sensor is reading normally before changing thresholds.
- Water the zone correctly. Inspect the sprinklers or emitters and allow enough time for water to enter the intended root zone without excessive runoff.
- Check the soil manually. Use a hand trowel, soil probe, or other suitable method to observe moisture near the sensor and elsewhere in the zone.
- Record readings as the soil dries. Compare the sensor value with plant appearance, soil feel, recent rainfall, temperature, and irrigation history.
- Adjust gradually. Make small threshold changes and observe at least several cycles before deciding whether the setting is reliable.
The goal is not to keep soil constantly wet. Most landscape plants need oxygen in the root zone as well as water. Continuous saturation can contribute to poor root function, nutrient problems, and disease.
Soil Type Changes How Readings Should Be Interpreted
Sandy Soil
Sandy soil often drains quickly and stores less plant-available water. Readings may change faster, and irrigation may need shorter or more carefully timed applications.
Loamy Soil
Loam generally balances drainage and water storage, but compaction, organic matter, layering, and local amendments can still create major differences.
Clay-Rich Soil
Clay-rich or compacted soil may absorb water slowly and remain wet longer. Cycle-and-soak scheduling can help reduce runoff during irrigation.
Some inexpensive resistance-style meters can also be influenced by fertilizer salts, soil composition, temperature, and contact quality. Treat the reading as one source of information rather than unquestionable proof.
Verify That Water Reaches the Intended Depth
A sensor can indicate moisture at its own location, but it cannot show whether the entire zone receives water evenly.
After irrigation, inspect several points across the landscape. In a lawn, a catch-can test can identify uneven sprinkler application. In drip-irrigated beds, check whether each emitter is working and whether the wetting pattern reaches the plant roots.
- Confirm that sprinkler heads rise, rotate, and retract correctly.
- Repair leaks, blocked nozzles, damaged tubing, and clogged emitters.
- Look for runoff before the programmed runtime ends.
- Check dry areas that may not be represented by the sensor.
- Separate irrigation zones with very different plants or hardware when possible.
If the system applies water unevenly, changing the moisture threshold may hide the problem rather than solve it.
Common Mistakes That Reduce Accuracy
- Installing beside a downspout: roof runoff can keep the sensor wet while the rest of the zone dries.
- Placing it beside a sprinkler or emitter: the sensor may receive more water than surrounding roots.
- Installing too shallow: surface evaporation and brief rainfall can dominate the reading.
- Installing too deep: the sensor may remain wet while young or shallow roots experience stress.
- Leaving air gaps: poor soil contact can produce unstable or unrealistic values.
- Using one sensor for unrelated zones: turf, shrubs, trees, and raised beds may not share the same moisture behavior.
- Ignoring the irrigation hardware: a sensor cannot correct leaks, pressure problems, overspray, or blocked emitters.
- Overriding every skipped cycle: repeated manual watering removes much of the benefit of moisture-based control.
- Trusting raw percentages across devices: values from different sensor designs may not be directly comparable.
- Never inspecting the system: damaged cables, movement, corrosion, soil disturbance, or plant changes can affect performance.
Maintenance and Seasonal Review
A permanently installed sensor should not be treated as maintenance-free. Landscapes change as plants grow, roots spread, mulch decomposes, soil settles, and irrigation hardware wears.
- Check the system at the start of the main watering season.
- Compare sensor readings with direct soil observations periodically.
- Review thresholds after planting changes, soil work, or irrigation repairs.
- Confirm that the sensor has not shifted, become exposed, or been damaged.
- Inspect wireless signal strength or battery condition where applicable.
- Follow local winterization procedures in freezing climates.
- Install firmware updates only after reviewing the manufacturer’s instructions.
What to Look for When Buying a Sensor
| Feature | Why It Matters | Question to Ask |
|---|---|---|
| Controller compatibility | Not every sensor can communicate with every irrigation controller. | Is this exact model supported by my current controller and wiring configuration? |
| Independent certification | Certification can provide more confidence than marketing claims alone. | Does the complete controller or add-on qualify under a recognized efficiency program? |
| Adjustable threshold | Different soils and plants may require different settings. | Can the moisture limit be changed and reviewed easily? |
| Outdoor durability | Heat, cold, water, fertilizer, tools, and soil movement can damage equipment. | Is the sensor designed for permanent outdoor installation in my climate? |
| Data access | Historical readings can make troubleshooting easier. | Can I see current values, previous readings, skipped cycles, and connection faults? |
| Offline operation | Cloud or Wi-Fi interruptions should not create uncontrolled watering. | What happens when internet access or the manufacturer’s service is unavailable? |
| Maintenance requirements | Batteries, calibration, cables, and probes may require periodic attention. | Which parts can be replaced, serviced, or recalibrated? |
WaterSense-Labeled Controllers
In the United States, the EPA WaterSense program labels qualifying soil moisture-based irrigation controllers that meet efficiency and performance requirements.
Confirm that the exact controller, add-on, or plug-in model appears in the official product search. A general claim that a brand is “water-saving” is not the same as certification of the product being purchased.
Frequently Asked Questions
Can one soil moisture sensor control an entire property?
It may influence several zones only when those zones have similar soil, sunlight, plants, root depth, and irrigation behavior. Landscapes with major differences often require separate sensors, settings, or zone improvements.
Should the sensor be placed in the wettest or driest area?
Usually neither extreme is ideal. Choose a representative location based on the product instructions and the area controlled. A permanently wet or unusually dry location can distort decisions for the rest of the zone.
Why does the meter say wet when the surface looks dry?
The surface loses moisture faster than deeper soil, particularly in sun or wind. Mulch can also hide moisture differences. Check the root zone directly before overriding the sensor.
Can fertilizer affect a moisture reading?
Some sensor technologies can be influenced by dissolved salts and soil composition. Follow the device instructions and compare readings with direct observations in the specific soil where it is used.
Does a sensor decide how long each zone should run?
Some products mainly allow or interrupt a scheduled cycle based on a moisture threshold. Other systems provide more advanced control. Review the exact controller behavior rather than assuming every sensor calculates runtime.
Can a soil moisture sensor prevent all overwatering?
No. Leaks, manual overrides, poor sprinkler coverage, incorrect thresholds, badly designed zones, and misplaced sensors can still waste water.
How often should the reading be checked manually?
Check more frequently during initial setup and after major changes. Once performance is stable, continue periodic checks during the watering season and whenever plants show unexpected stress.
A soil moisture sensor is most valuable when it supports a well-designed irrigation system and a gardener who still verifies what is happening in the landscape.
Start by repairing leaks and coverage problems. Choose a representative location, follow the manufacturer’s installation instructions, compare readings with actual root-zone moisture, and adjust thresholds gradually.
The goal is not to keep soil permanently wet. It is to irrigate only when plants need water and to apply that water effectively enough to reach their roots without unnecessary runoff or repeated shallow cycles.
Sources and Further Reading
- U.S. EPA WaterSense: Soil Moisture-Based Irrigation Controllers
- U.S. EPA WaterSense: WaterSense-Labeled Controllers
- University of Minnesota Extension: Soil Moisture Sensors for Irrigation Scheduling
- University of Minnesota Extension: Water-Saving Strategies for Home Lawns
- Colorado State University Extension: Methods to Schedule Home Lawn Irrigation
- Colorado State University Extension: Irrigating the Vegetable Garden

The BotaniQ Editorial Team writes and maintains practical guides about indoor gardening, smart irrigation, plant care, garden automation, and growing technology. Where relevant, articles reference official documentation, university extension resources, and other reputable sources. Content is updated when material information changes.